概述
本文主要介绍如何在 k3s 上为服务配置 https 证书(cloudflare)
准备环境
- cloudflare: 域名编辑权限 API Token
- 域名
- 已安装 k3s 的机器
目标
在 k3s 上暴露的服务访问会携带已发布认证的 HTTPS 证书
步骤
安装 cert-manager
参考: https://cert-manager.io/docs/installation/
可使用 helm 进行更简易的安装
安装好后可以执行如下命令查看命名空间是否建立:
$ kubectl get ns

NAME              STATUS   AGE
kube-system       Active   46h
kube-public       Active   46h
kube-node-lease   Active   46h
default           Active   46h
develop           Active   44h
cert-manager      Active   27h # 已建立
查看 pods 是否正常工作:
kubectl get pods -n cert-manager

NAME                                      READY   STATUS    RESTARTS   AGE
cert-manager-cainjector-c7d4dbdd9-xfjdn   1/1     Running   0          27h
cert-manager-6dc66985d4-n5crn             1/1     Running   0          27h
cert-manager-webhook-847d7676c9-rz4ld     1/1     Running   0          27h
配置 DNS 解析
首先在 DNS 服务商配置临时 DNS 解析, 并以 cloudflare 为例, 需获取编辑 DNS 权限的 API Token
eg: 已配置一条 hello-world 解析到主机中, 地址任意填写
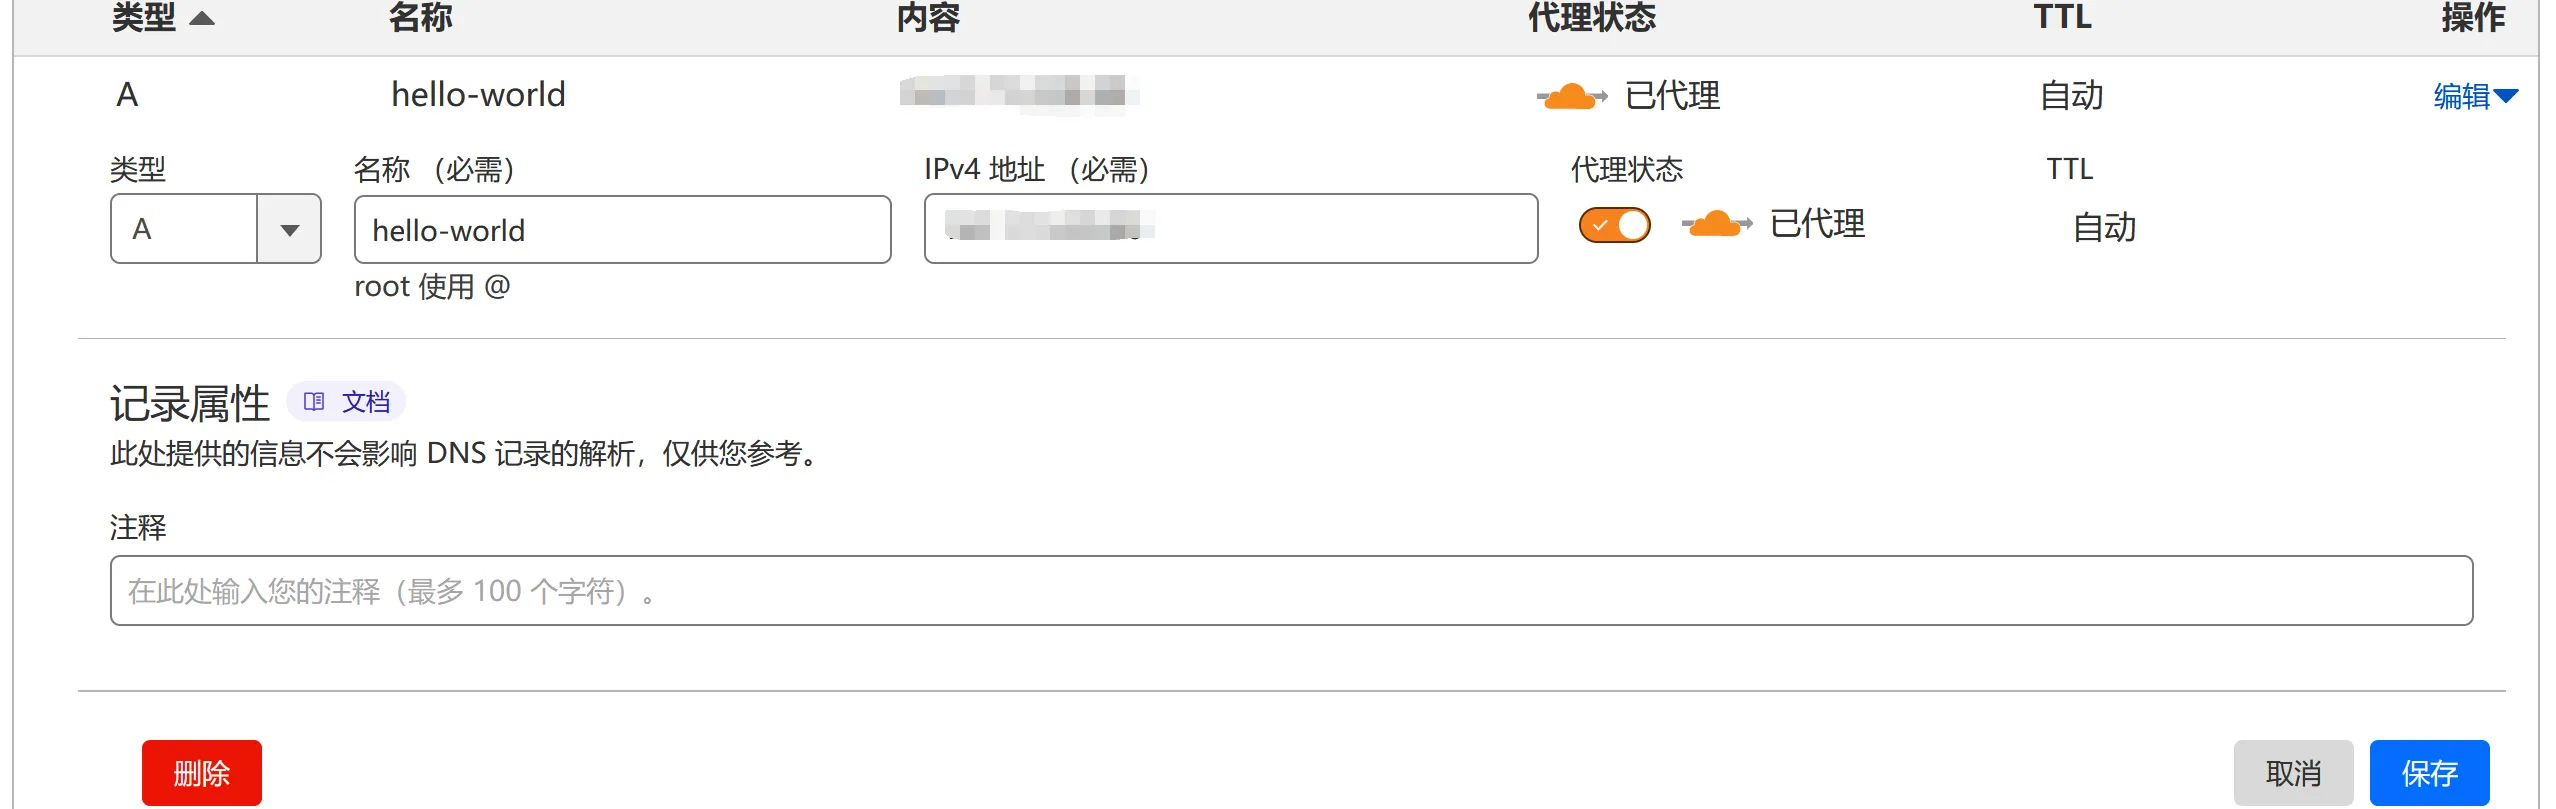
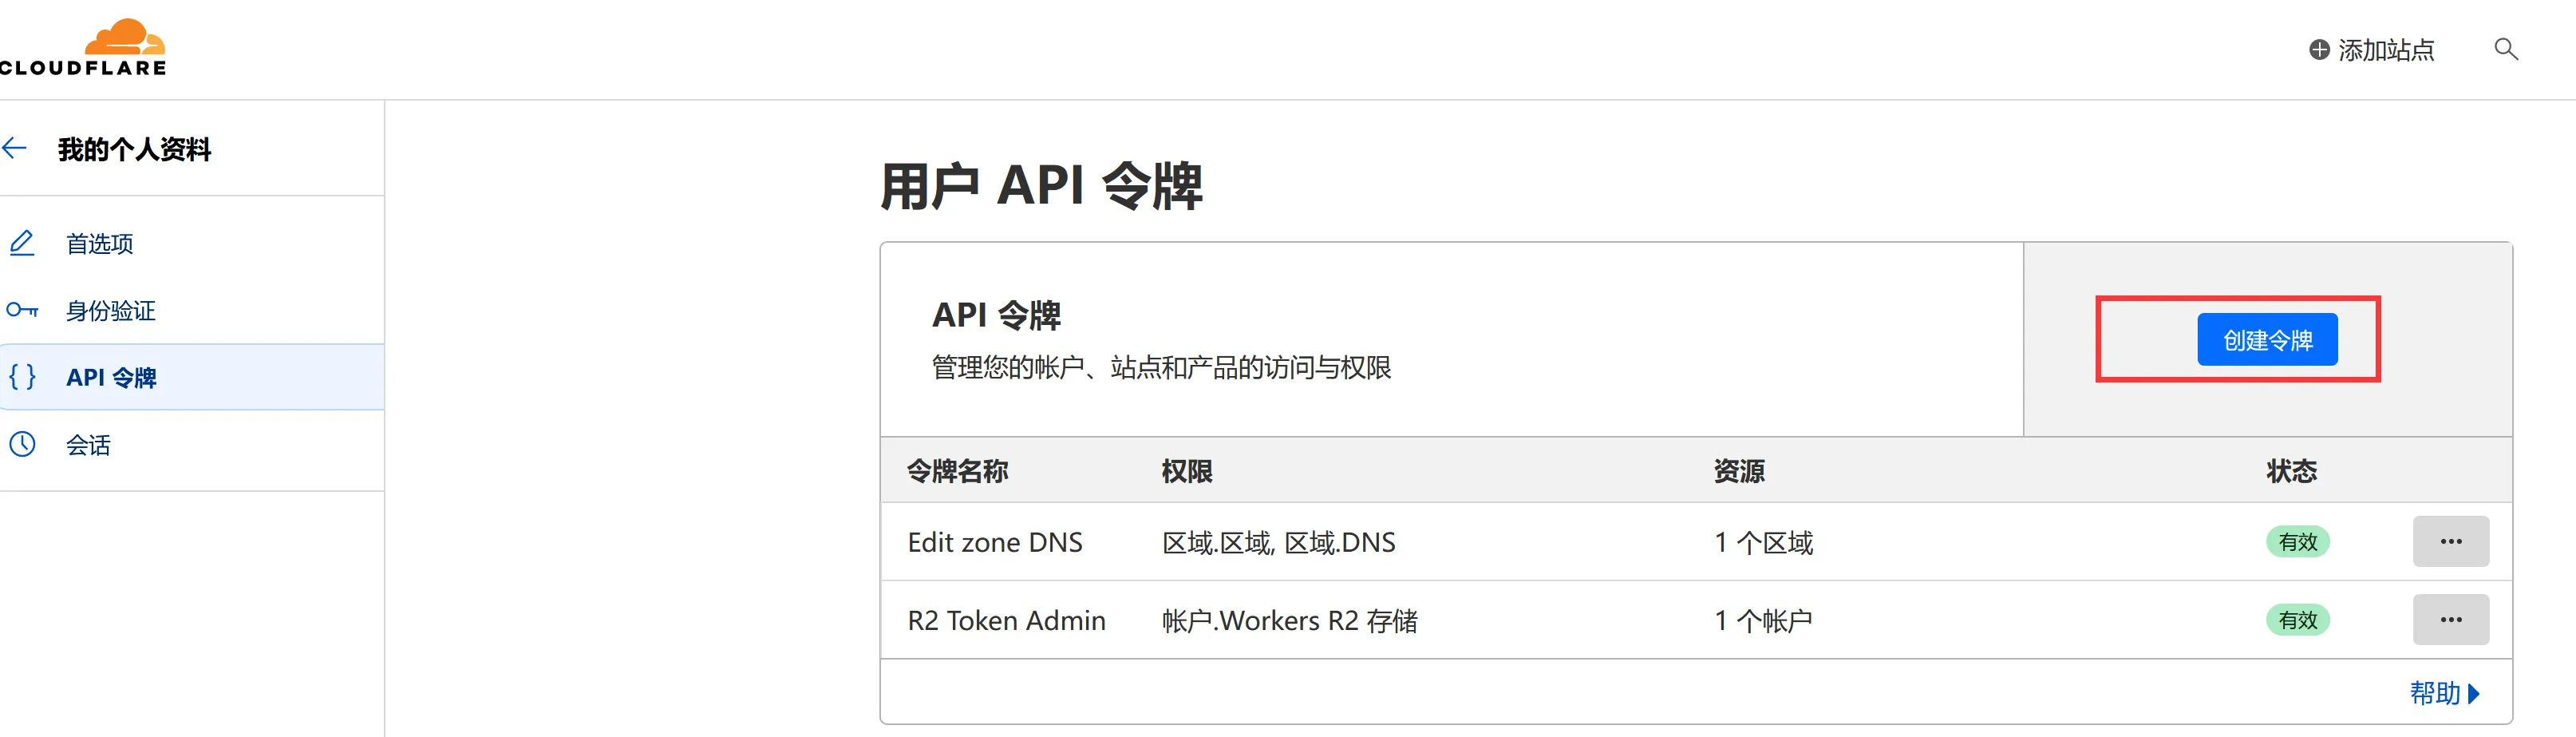
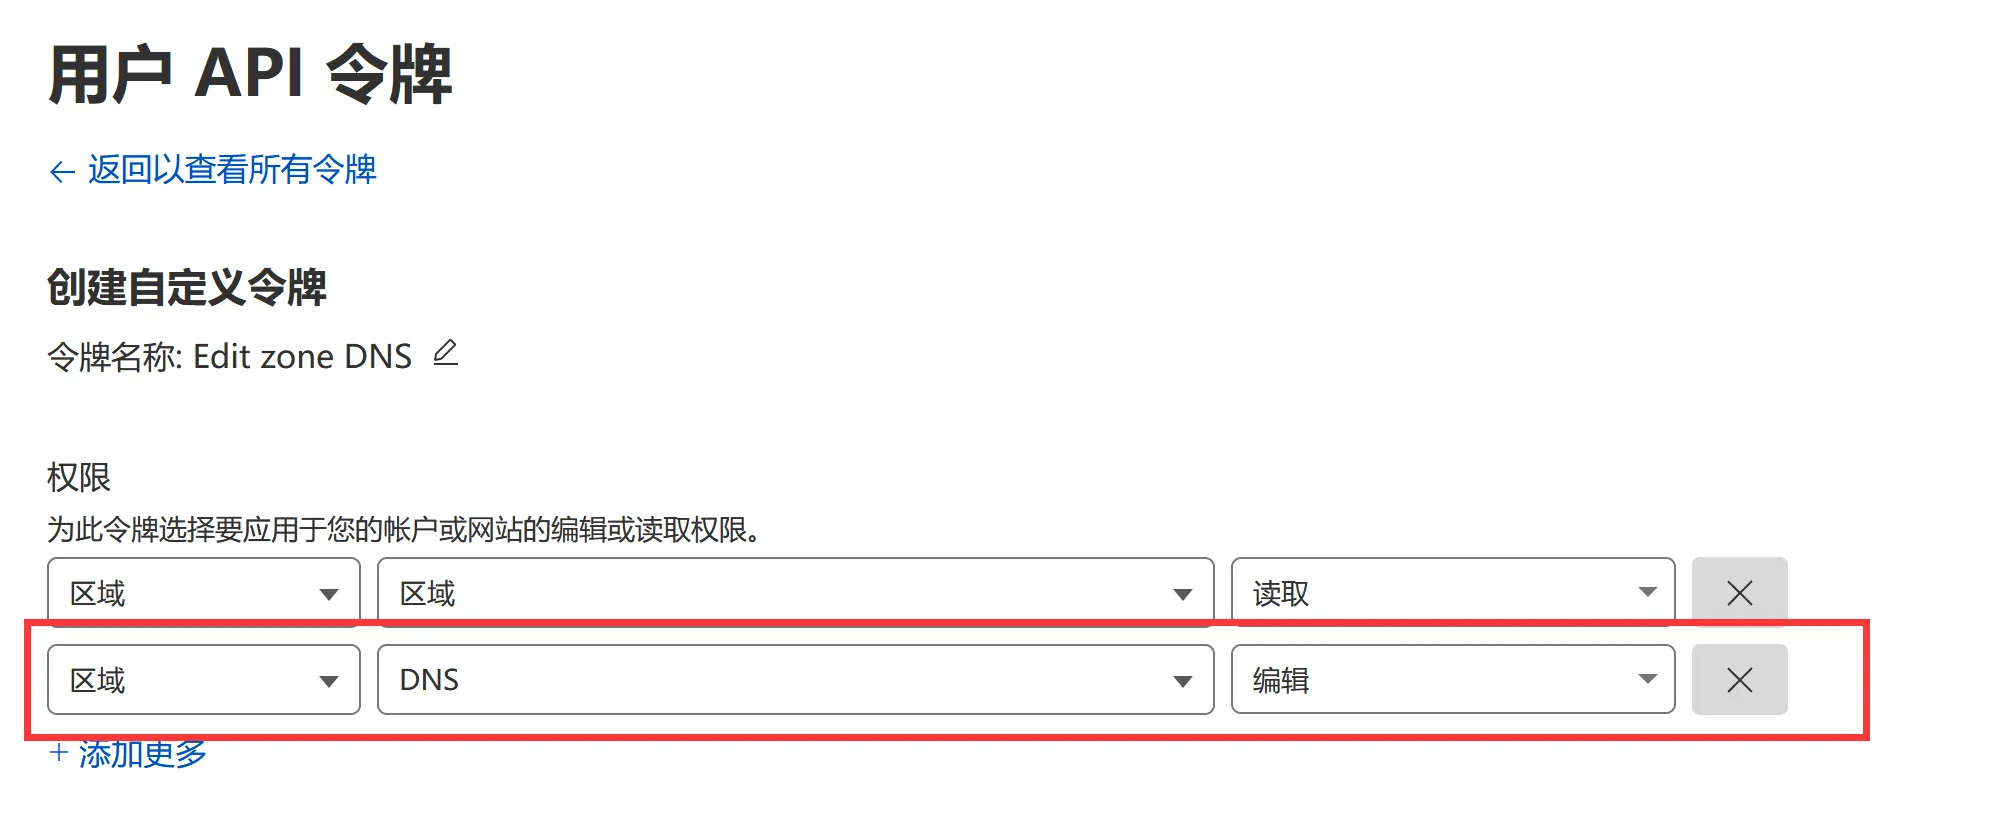
并进入个人账号 - API 令牌页面, 创建编辑 DNS 权限 Token:
在默认命名空间上暴露服务
创建 issuer.yml 文件, 该文件告知 cert-manager 如何获取证书
apiVersion: cert-manager.io/v1
kind: Issuer
metadata:
  name: ca-issuer
spec:
  acme:
    email: <YOUR EMAIL> # 替换为你的邮箱
    server: https://acme-v02.api.letsencrypt.org/directory
    privateKeySecretRef:
      name: issuer-key
    solvers:
      - dns01:
          cloudflare:
            email: <YOUR EMAIL> # 替换为你的 cloudflare 邮箱账号
            apiTokenSecretRef:
              name: cloudflare-api-key-secret # 此处值不需要修改
              key: api-key # 此处值不需要修改
我们需要创建一个 Secret 而非写入到文件 k3s 管理, 名称为上面填写的 cloudflare-api-key-secret:
# Token 替换为 cloudflare 的 API Token
kubectl create secret generic cloudflare-api-key-secret --from-literal=api-key=<TOKEN>
这样就告知 k3s 从哪里获取 secret
执行命令以生效:
kubectl apply -f issuer.yml创建 certificate.yml 文件, 该文件告知 cert-manager 需要分发的证书域名
apiVersion: cert-manager.io/v1
kind: Certificate
metadata:
  name: hello-world-ca-tsl # 可替换, 当前仅测试分发用
spec:
  duration: 2160h # 90d
  renewBefore: 360h # 15d
  subject:
    organizations:
      - testorganization # 可填写任意值
  privateKey:
    algorithm: RSA
    encoding: PKCS1
    size: 2048
  dnsNames:
    - hello-world.<YOUR DOMAIN> # 替换为你的域名, 本次以 hello-world 为例
  secretName: hello-world-ca-tsl # 可替换, 当前仅测试分发用
  issuerRef:
    name: ca-issuer
    kind: Issuer
    group: cert-manager.io
执行命令以生效:
kubectl apply -f certificate.yml执行命令, 查看证书分发情况:
kubectl get certificate

NAME                 READY   SECRET               AGE
hello-world-ca-tsl   True    hello-world-ca-tsl   100s
注意: apply 后, READY 状态为 False, 证书需要耗时较长时间获取, 视运营商及网络情况, 通常为数分钟
此时我们创建一个 hello-world.yml 用来部署, 并绑定 tls 证书即可
apiVersion: apps/v1
kind: Deployment
metadata:
  name: nginx # Name of the deployment
  labels:
    app: nginx # Name of your application
spec:
  selector:
    matchLabels:
      app: nginx # Name of your application
  replicas: 1 # Number of replicas
  template:
    metadata:
      labels:
        app: nginx # Name of your application
    spec:
      containers:
        - name: nginx # Name of the container
          image: nginx:latest # The image you want to run
          ports:
            # Ports are the ports that your application uses.
            - containerPort: 80 # The port that your application uses
          readinessProbe:
            tcpSocket:
              port: 80
            initialDelaySeconds: 5
            periodSeconds: 10
          livenessProbe:
            tcpSocket:
              port: 80
            initialDelaySeconds: 15
            periodSeconds: 20
---
apiVersion: v1
kind: Service
metadata:
  name: nginx
spec:
  selector:
    app: nginx
  type: ClusterIP
  # ClusterIP means this service can be accessed by any pod in the cluster
  ports:
    - name: http
      port: 80
---
apiVersion: networking.k8s.io/v1
kind: Ingress
metadata:
  name: nginx # Name of the ingress object
spec:
  tls:
    - hosts:
        - hell-world.<YOUR DOMAIN> # 签名的证书域名, 替换为你的域名
      secretName: hello-world-ca-tsl # 注意: 此时的名称与之前填写的一致
  rules:
    - host: hell-world.<YOUR DOMAIN> # 替换为你的域名
      http:
        paths:
          # Path-based routing settings:
          - path: /
            pathType: Prefix
            backend:
              service:
                name: nginx # The name of the service
                port:
                  number: 80 # Service Portnumber
执行命令以生效:
kubectl apply -f hello-world.yml大功告成, 此时通过浏览器访问域名(hello-world.*), 应当正确的显示证书
更换命名空间
通常, 我们业务应用不是部署在 default 的命名空间中, 需要更换命名空间
假设需要签名的目标命名空间为 staging
首先, 我们需要重新创建 issuer, 创建 issuer-staging.yml, 内容与上面一致, 仅需稍作修改:
apiVersion: cert-manager.io/v1
kind: Issuer
metadata:
  name: ca-issuer
  # 增加命名空间配置
  namespace: staging
spec:
  acme:
    email: <YOUR EMAIL> # 替换为你的邮箱
    server: https://acme-v02.api.letsencrypt.org/directory
    privateKeySecretRef:
      name: issuer-key
    solvers:
      - dns01:
          cloudflare:
            email: <YOUR EMAIL> # 替换为你的 cloudflare 邮箱账号
            apiTokenSecretRef:
              name: cloudflare-api-key-secret # 此处值不需要修改
              key: api-key # 此处值不需要修改
业务应用部署命名空间示例:
apiVersion: apps/v1
kind: Deployment
metadata:
  name: nginx # Name of the deployment
  namespace: staging # Name of the namespace
  labels:
    app: nginx # Name of your application
spec:
  selector:
    matchLabels:
      app: nginx # Name of your application
  replicas: 1 # Number of replicas
  template:
    metadata:
      labels:
        app: nginx # Name of your application
    spec:
      containers:
        - name: nginx # Name of the container
          image: nginx:latest # The image you want to run
          ports:
            # Ports are the ports that your application uses.
            - containerPort: 80 # The port that your application uses
          readinessProbe:
            tcpSocket:
              port: 80
            initialDelaySeconds: 5
            periodSeconds: 10
          livenessProbe:
            tcpSocket:
              port: 80
            initialDelaySeconds: 15
            periodSeconds: 20
---
apiVersion: v1
kind: Service
metadata:
  name: nginx
  namespace: staging
spec:
  selector:
    app: nginx
  type: ClusterIP
  # ClusterIP means this service can be accessed by any pod in the cluster
  ports:
    - name: http
      port: 80
---
apiVersion: networking.k8s.io/v1
kind: Ingress
metadata:
  name: nginx # Name of the ingress object
  namespace: staging # Name of the namespace
spec:
  tls:
    - hosts:
        - nginx-k3s.<YOUR DOMAIN>
      secretName: nginx-k3s-ca-tsl
  rules:
    - host: "nginx-k3s.<YOUR DOMAIN>" # Your hostname
      http:
        paths:
          # Path-based routing settings:
          - path: /
            pathType: Prefix
            backend:
              service:
                name: nginx # The name of the service
                port:
                  number: 80 # Service Portnumber

---
# 注意此处的 Certificate kind
apiVersion: cert-manager.io/v1
kind: Certificate
metadata:
  name: nginx-k3s-ca-tsl
  namespace: staging
spec:
  duration: 2160h # 90d
  renewBefore: 360h # 15d
  subject:
    organizations:
      - myorganization
  privateKey:
    algorithm: RSA
    encoding: PKCS1
    size: 2048
  dnsNames:
    - nginx-k3s.<YOUR DOMAIN>
  secretName: nginx-k3s-ca-tsl
  issuerRef:
    name: ca-issuer
    kind: Issuer
    group: cert-manager.io